Cold plunging is gaining popularity for its various health benefits, but you don’t need a fancy tub to get started. Whether you’re looking to boost your physical health, improve mental resilience, or just want to try something new, there are plenty of ways to incorporate cold plunging into your routine right at home. Let’s dive into how you can start cold plunging without breaking the bank or needing a dedicated setup.
Key Takeaways
- Cold plunging can improve physical health and boost mental resilience.
- You can start with just a cold shower to experience benefits without a tub.
- Ice baths can be created using your bathtub, but they require ice and maintenance.
- DIY setups like stock tanks or chest freezers are affordable alternatives for cold plunging.
- Safety is key; always listen to your body and consult a professional if needed.
Understanding Cold Plunging Benefits
Cold plunging, that borderline-insane act of submerging yourself in icy water, has gained popularity, and for good reason. It’s not just a trend; it’s a practice with a range of potential benefits for both your physical and mental well-being. Let’s explore what makes people willingly subject themselves to the chill.
Physical Health Advantages
For athletes, cold plunging is often used to help relieve pain and sore muscles. It can also reduce injury-induced swelling. But the benefits extend beyond just athletic recovery. Some studies suggest that regular cold exposure can help boost your immune system. The idea is that the cold shock can stimulate the production of white blood cells, which are key players in fighting off infections. It’s like a workout for your immune system!
Mental Resilience Boost
Beyond the physical, cold plunging is also touted for its mental benefits. Many people report feeling a sense of euphoria and heightened energy after a plunge, similar to a runner’s high. This is likely due to the release of endorphins and other feel-good chemicals in response to the cold shock. Over time, regularly facing the discomfort of cold water can help you build mental resilience and improve your ability to handle stress in other areas of your life. It’s like training your mind to be tougher.
Improved Circulation
When you immerse yourself in cold water, your blood vessels constrict. This is your body’s way of trying to conserve heat. When you warm up afterward, your blood vessels dilate, allowing blood to flow more freely. This process can improve circulation and help deliver oxygen and nutrients to your tissues. Think of it as a vascular workout. Some people also sleep better after cold plunging, due to the re-calibration of their circadian rhythm.
Getting Started With Cold Showers
So, you’re thinking about getting into cold plunging but aren’t quite ready to take the full ice bath plunge? Cold showers are a fantastic and accessible way to dip your toes (literally!) into the world of cold water therapy. They’re easy to incorporate into your daily routine, require no special equipment, and can provide a surprising number of benefits. Think of it as a gateway drug to the more intense cold plunge experiences. Plus, it’s a great way to wake yourself up in the morning!
Setting the Right Temperature
Okay, let’s be real: the idea of a cold shower isn’t exactly appealing to everyone. The key is to start gradually. Don’t just crank the water to the coldest setting right away. Instead, begin with your normal shower temperature and then, over the course of a few days or weeks, slowly decrease the temperature. The goal is to find a temperature that’s challenging but not unbearable. You should feel a definite chill, but not to the point where you’re gasping for air and running for the towel. Some people find that around 60°F (15°C) is a good starting point, but experiment to see what works best for you. Remember, it’s about building tolerance, not torturing yourself.
Duration and Frequency
Just like with the temperature, you don’t need to go all-in on the duration right away. Start with just 30 seconds of cold water at the end of your regular shower. Then, gradually increase the time as you become more comfortable. Aim for 2-3 minutes of cold water exposure. As for frequency, try to incorporate cold showers into your routine 3-5 times per week. Consistency is key to experiencing the benefits. Think of it like building a muscle – you need to work it regularly to see results. You might even find yourself looking forward to that invigorating blast of cold water!
Benefits of Cold Showers
Okay, so why put yourself through the discomfort of a cold shower? Well, the potential benefits are pretty impressive. Many people report increased energy levels, improved mood, and a boost in their immune system. Cold water exposure can also help to reduce inflammation, improve circulation, and even promote weight loss. Plus, there’s the mental toughness aspect. Deliberately exposing yourself to something uncomfortable can help you build resilience and mental fortitude. It’s like a mini-challenge that prepares you to handle bigger challenges in life. And hey, if nothing else, it’s a great conversation starter! You can tell everyone you’re doing cold water therapy and sound super hardcore.
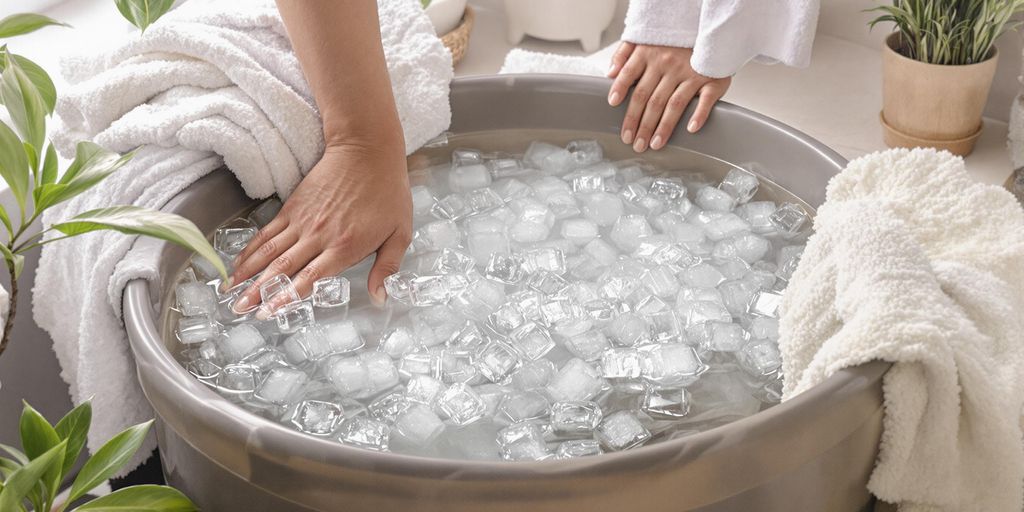
Creating an Ice Bath at Home
Using Your Bathtub Effectively
So, you want to make an ice bath at home? If you have a bathtub, you’re already halfway there! Your existing tub is a cost-effective way to start. First, make sure your tub is clean. Then, fill it about halfway with cold water. Next, start adding ice. You’ll probably need a lot more than you think to get the water cold enough. Keep adding ice until you reach your target temperature. It can be a bit of a pain hauling all that ice, but it’s a good starting point.
Ice Bath Temperature Guidelines
What temperature are we aiming for? Ideally, you want the water to be between 50°F and 59°F (10°C and 15°C). Use a thermometer to check the temperature regularly as the ice melts. It’s important to monitor this, especially when you’re first starting out. You can always add more ice to keep it in the right range. Remember, safety first! You can use a thermometer to check the temperature.
Safety Tips for Ice Baths
Okay, let’s talk safety. Here are a few things to keep in mind:
- Don’t stay in too long. Start with just a few minutes (2-5 minutes) and gradually increase the time as you get used to it. Pushing yourself too hard too soon can be dangerous.
- Listen to your body. If you start to feel too cold or uncomfortable, get out. There’s no shame in tapping out early.
- Have someone nearby. It’s always a good idea to have someone around, especially when you’re new to ice baths. They can help if you start to feel unwell.
- Avoid chest freezers. I’ve seen people try to repurpose chest freezers, but that’s a big no-no. It’s just not worth the risk. You can also look into inflatable cold plunges for a safer alternative.
- Warm up afterward. Have a warm towel and clothes ready for when you get out. A warm shower or some light exercise can also help you warm up quickly.
Exploring DIY Cold Plunge Setups
So, you’re thinking about building your own cold plunge? Awesome! There are a bunch of ways to do it, and it can be way cheaper than buying a fancy setup. Plus, you get the satisfaction of building something yourself. Let’s look at some options.
Repurposing Stock Tanks
Stock tanks are a popular choice, and you’ve probably seen them all over the internet. They’re big, sturdy, and can definitely hold a lot of icy water. However, keep in mind that metal stock tanks aren’t insulated at all. This means you’ll need a powerful chiller to keep the water cold, especially during the summer. Some people have had success insulating them, but it can be a hassle. A reader shared that before switching to a cooler, they needed a 1hp chiller that ran almost all the time in the summer with their stock tank. You can find videos online about building a stock tank with a water chiller setup.
Using Chest Freezers Safely
Okay, this one requires a bit more caution, but it’s definitely doable. People have converted chest freezers into cold plunges, and they’re great because they’re already insulated! The big thing here is safety. You absolutely need to make sure the freezer is properly grounded and that you’re using a GFCI outlet to prevent electric shock. Also, you’ll need to disable or remove the compressor and refrigerant lines. You don’t want that stuff leaking into your water! Make sure to do your research and follow safety guidelines carefully before attempting this.
Building a Custom Cold Plunge
If you’re feeling ambitious, you can build a completely custom cold plunge. This gives you the most control over the size, shape, and materials. You could use wood, plastic, or even concrete. The key here is to make sure it’s waterproof and well-insulated. You’ll also need to figure out a way to drain and clean it easily. This option is definitely more involved, but it can be really rewarding if you’re up for the challenge.
Cold Water Bucket Pour Technique
Sometimes, you just need a quick and dirty way to get that cold plunge feeling without all the fuss. That’s where the cold water bucket pour comes in. It’s surprisingly effective and doesn’t require any special equipment beyond, well, a bucket and some cold water. It’s a great way to test the waters (pun intended) before committing to a full-blown ice bath setup.
How to Perform a Bucket Pour
Okay, so it’s not rocket science, but there’s a bit of technique involved to maximize the benefits and minimize the initial shock. Here’s how I usually do it:
- Fill a bucket with cold water. I mean, really cold. Add ice if you can. The colder, the better (within reason, of course – don’t go overboard!).
- Find a good spot. Ideally, you’ll want to be outside or in a shower where you don’t mind getting water everywhere. Trust me, it’s going to splash.
- Take a deep breath. This is the important part. Mentally prepare yourself for the cold shock. It helps, I promise.
- Pour the water over your head and body. Start with the back of your neck and shoulders, then let it cascade down your torso. Try to control your breathing and focus on relaxing into the cold.
- Embrace the sensation. It’s going to be intense, but try to stay in the moment and focus on how your body is reacting. It’s a weirdly invigorating feeling.
Target Areas for Maximum Effect
While pouring the water over your whole body is beneficial, focusing on certain areas can amplify the effects. I’ve found these spots to be particularly effective:
- Back of the neck: This area is super sensitive to temperature changes and can trigger a strong nervous system response.
- Upper back and shoulders: These muscles tend to hold a lot of tension, and the cold water can help release it.
- Chest: Exposing your chest to cold can stimulate the vagus nerve, which has a calming effect on the body.
Benefits of Bucket Pouring
Don’t underestimate the power of a simple bucket of cold water! It might seem less intense than a full ice bath, but it still offers a bunch of benefits:
- Quick and convenient: It’s a great option when you don’t have time for a longer cold plunge.
- Cost-effective: All you need is a bucket and some water (and maybe some ice).
- Mental resilience: Even a short burst of cold exposure can help you build mental toughness and improve your ability to handle stress.
- Improved circulation: The cold water constricts blood vessels, which can improve circulation when they dilate again afterward.
- Energy boost: That initial shock of cold water can leave you feeling surprisingly energized and alert.
Utilizing Your Outdoor Pool
If you’re lucky enough to have an outdoor pool, you’ve already got a potential cold plunge setup! It’s not always ideal, but it’s definitely doable. The biggest challenge is managing the temperature, especially when the weather is warmer. But when the conditions are right, your pool can be a great way to experience the benefits of cold water immersion.
Cold Plunging in Winter Months
Winter is prime time for using your outdoor pool as a cold plunge. The water temperature naturally drops, often getting into a suitable range without needing to add ice. This can be a convenient and cost-effective way to incorporate cold plunging into your routine. Just be sure to check the water temperature regularly with a reliable thermometer to ensure it’s within a safe range, ideally between 50-60°F (10-15°C).
Maintaining Pool Temperature
Keeping your pool cold enough during warmer months can be tricky. Here are a few things you can try:
- Use a pool chiller: These devices are designed to cool pool water, but they can be expensive to run.
- Add ice: This is a more budget-friendly option, but it requires a lot of ice and can be time-consuming.
- Cover the pool: A good pool cover can help to insulate the water and prevent it from warming up too quickly.
It’s worth noting that maintaining a consistently cold temperature in an outdoor pool can be difficult and may not always be feasible, especially during the peak of summer.
Safety Precautions for Pool Use
Safety is paramount when using your pool for cold plunging. Keep these points in mind:
- Never plunge alone: Always have someone nearby in case of an emergency.
- Limit your time: Start with short plunges (1-2 minutes) and gradually increase the duration as you become more accustomed to the cold.
- Avoid plunging if you have any underlying health conditions: Consult with your doctor before starting cold plunging, especially if you have heart problems, high blood pressure, or other medical concerns.
- Warm up properly afterward: Have a warm towel and clothes ready, and consider taking a warm shower or drinking a hot beverage to help your body rewarm.
- Be aware of the risks of hypothermia: Know the signs and symptoms of hypothermia and seek medical attention immediately if you experience any of them.
Investing in a Dedicated Cold Plunge Tub
If you’re serious about cold plunging and want a hassle-free experience, a dedicated cold plunge tub might be the right choice for you. Forget the ice runs and temperature monitoring – these tubs are designed for convenience and consistent performance. Let’s explore the advantages, costs, and features to consider.
Advantages of a Cold Plunge Tub
One of the biggest perks of a dedicated tub is its ready-to-use convenience. No more prepping ice baths or fiddling with temperatures. These tubs often come with:
- Built-in chillers to maintain consistent temperatures.
- Filtration systems to keep the water clean.
- User-friendly controls for easy operation.
- Some even have smartphone connectivity for remote adjustments.
Think of it as an investment in your wellness routine, saving you time and effort in the long run. You can find some great plunge tub options online.
Cost Considerations
Dedicated cold plunge tubs can range in price, from a few thousand dollars to upwards of $7,000 or more. The cost depends on factors like:
- Size and materials
- Chiller capacity
- Filtration system quality
- Additional features (e.g., ozone sanitation, heating)
It’s a significant investment, so weigh the costs against the convenience and long-term benefits. Consider the ongoing operational costs, too, such as electricity for the chiller and replacement filters. Some people find that DIY ice bath alternatives are more cost effective.
Features to Look For
When shopping for a cold plunge tub, keep these features in mind:
- Temperature Control: A reliable chiller is essential for maintaining your desired temperature. Look for tubs with precise temperature settings and consistent cooling power.
- Filtration and Sanitation: A good filtration system keeps the water clean and reduces the need for frequent water changes. Some tubs also have ozone or UV sanitation systems to kill bacteria and algae.
- Insulation: Proper insulation helps maintain the water temperature and reduces energy consumption. A well-insulated tub will keep the water cold for longer and save you money on electricity.
- Size and Ergonomics: Choose a tub that’s comfortable for your body size and shape. Consider features like built-in seats or steps for easy entry and exit. Stairs and seats can make the experience much more comfortable.
- Durability: Look for tubs made from high-quality, durable materials that can withstand regular use and exposure to cold water. Some tubs are designed for indoor or outdoor use, so choose one that suits your needs.
Before you buy, read reviews and compare different models to find the best cold plunge tub for your budget and needs. The ModTub is a good option to consider.
Cold Plunge Centers and Alternatives
So, you’re curious about cold plunging but not ready to commit to buying a tub? No problem! There are other ways to get your chill on. Let’s explore some options, from finding a local spot to weighing the benefits of professional guidance.
Finding Local Cold Plunge Facilities
Think of it like this: before you buy the cow, you can sample the milk. Many wellness centers and gyms now offer cold plunge facilities. This is a great way to try it out without a huge investment. A quick Google search for “cold plunge near me” should give you some leads. These places often have the equipment and expertise to make sure you’re doing it safely and effectively. Plus, you can chat with other cold plunge enthusiasts!
Benefits of Professional Guidance
One of the biggest advantages of going to a dedicated center is the guidance you’ll receive. The staff can help you understand the proper techniques, monitor your response to the cold, and ensure you’re not pushing yourself too hard, especially when you’re just starting out. They can also answer any questions you have and provide tips for maximizing the benefits of cold plunging. It’s like having a cold plunge coach!
Comparing Costs and Experiences
Okay, let’s talk money. Visiting a cold plunge center will cost you, but it’s usually less than buying your own setup. Prices vary depending on the location and the services offered. Some places offer single sessions, while others have memberships. Here’s a rough idea of what you might expect:
- Single Session: $25 – $50
- Monthly Membership: $100 – $200
- Drop-in Class: $30-$60
Consider the experience too. A center will likely have a controlled environment, proper sanitation, and maybe even some fancy features like chromotherapy (colored lights) or guided meditations. Doing it at home might be cheaper, but it’s up to you to manage the temperature, cleanliness, and overall vibe.
Building Tolerance to Cold Water
Gradual Exposure Techniques
Okay, so you’re ready to embrace the chill, but jumping straight into an ice bath might be a bit much. Think of it like easing into a hot tub – you don’t just cannonball in, right? Start with shorter durations at slightly less frigid temperatures. Maybe begin with cold showers, gradually decreasing the temperature each time. Or, if you’re using a tub, start with the water a bit warmer and add ice slowly over a few minutes. The key is to let your body adjust.
- Start with 15-30 second cold showers.
- Reduce the temperature gradually each session.
- Increase the duration as you become more comfortable.
Listening to Your Body
This is super important: pay attention to what your body is telling you. Shivering is normal, but if you start to feel intense pain, numbness, or excessive discomfort, it’s time to get out. Everyone’s tolerance is different, and there’s no shame in taking it slow. Don’t push yourself to the point of feeling unsafe. It’s not a competition; it’s about building resilience and reaping the benefits. If you have any underlying health conditions, definitely check with your doctor before starting cold plunging.
Tracking Your Progress
Keep a log of your cold plunge sessions. Note the water temperature, the duration of your plunge, and how you felt both during and after. This will help you identify patterns, track your progress, and adjust your approach as needed. You might find that you tolerate colder temperatures better at certain times of the day, or that certain warm-up routines help you prepare for the plunge. Plus, it’s just cool to see how far you’ve come!
Here’s a simple example of how you could track your progress:
| Date | Temperature (°F) | Duration (seconds) | Perceived Discomfort (1-10) | Notes |
|---|---|---|---|---|
| May 1, 2025 | 60 | 30 | 4 | Felt a bit chilly at first, then okay. |
| May 3, 2025 | 55 | 45 | 5 | Shivering subsided quickly. |
| May 5, 2025 | 50 | 60 | 6 | Needed to focus on breathing. |
Safety Considerations for Cold Plunging
Cold plunging can be a great way to boost your health, but it’s super important to do it safely. It’s not something to jump into without thinking it through. You need to be aware of the risks and how to minimize them. I mean, we’re talking about putting your body into really cold water, and that can have some serious effects if you’re not careful. So, let’s break down the key things you need to keep in mind.
Understanding Risks
Okay, so cold plunging isn’t just a fun, trendy thing to do; it comes with real risks. The biggest one is hypothermia, which happens when your body loses heat faster than it can produce it. This can lead to shivering, confusion, and eventually, loss of consciousness. Also, cold water immersion can cause a rapid increase in blood pressure and put a strain on your heart. People with heart conditions need to be extra cautious and talk to their doctor before even thinking about cold plunging. Another thing to watch out for is cold shock response – that gasp you take when you first get into cold water. This can cause hyperventilation and even drowning if you’re not prepared. It’s not something to mess around with.
Post-Plunge Warm-Up Strategies
Alright, you’ve taken the plunge (literally!), but you’re not done yet. Warming up properly afterward is just as important as the plunge itself. Don’t just stand around shivering! Here’s what you should do:
- Get out of the cold water immediately: Sounds obvious, but don’t linger. The longer you stay in the cold, the harder it will be to warm up.
- Dry off quickly: Use a towel to dry your skin and hair thoroughly. Moisture will just make you colder.
- Change into warm, dry clothes: This is a no-brainer. Layers are your friend!
- Drink something warm: Hot tea, coffee, or even just warm water can help raise your core temperature.
- Move around: Gentle exercise, like walking or stretching, can help increase blood flow and generate heat. Avoid strenuous activity, though, as it can put extra strain on your body.
Consulting with a Healthcare Professional
Seriously, before you start any kind of cold plunging routine, talk to your doctor. This is especially important if you have any existing health conditions, like heart problems, high blood pressure, or diabetes. Your doctor can assess your individual risk factors and give you personalized advice on whether cold plunging is safe for you. They can also help you understand any potential interactions with medications you’re taking. It’s always better to be safe than sorry, right?
Incorporating Cold Plunging into Your Routine
Creating a Consistent Schedule
Okay, so you’re digging the cold plunge thing, but how do you make it stick? It’s all about building it into your day-to-day. Think about when you’re most likely to actually do it. First thing in the morning to wake you up? After a workout to help with recovery? Evening to wind down? Pick a time that works with your life, not against it.
- Set a reminder on your phone. Seriously, it helps.
- Prep your space the night before. Get the tub ready, ice in the freezer, whatever you need.
- Start small. Don’t aim for daily plunges right away. Maybe 2-3 times a week to start.
Combining with Other Wellness Practices
Cold plunging doesn’t have to be a solo act. It plays well with others! Think about pairing it with other things you’re already doing for your health. For example:
- Meditation: Do a quick meditation session right before or after your plunge to really center yourself.
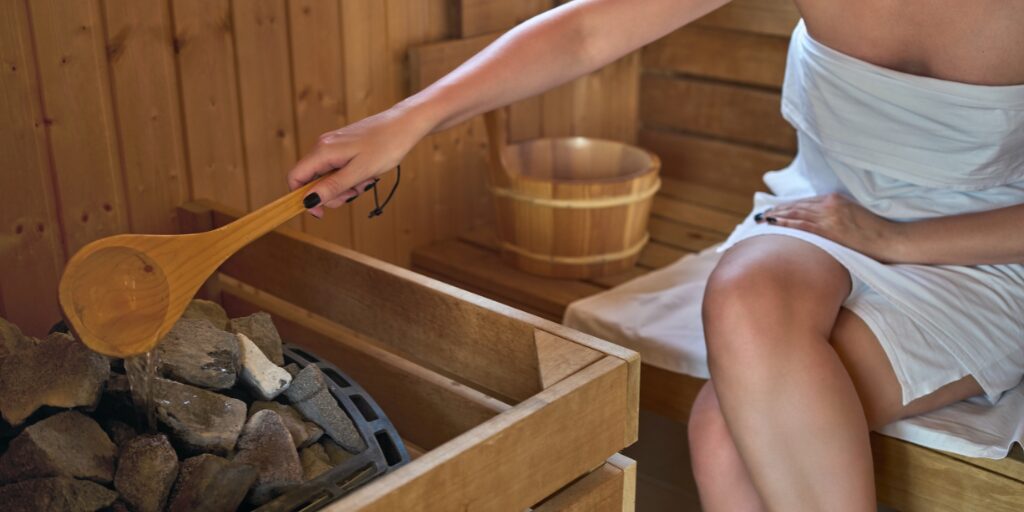
- Sauna: The hot-cold contrast is amazing. Sauna first, then plunge. Your body will thank you.
- Exercise: Plunge after a tough workout to reduce inflammation and speed up recovery.
- Breathwork: Combine with Wim Hof Method breathing techniques for a supercharged experience.
Setting Realistic Goals
Don’t go overboard! It’s easy to get excited and want to plunge every day for 10 minutes, but that’s a recipe for burnout (or hypothermia!). Be real with yourself. What can you actually commit to? Here’s a sample progression:
- Week 1: 2 plunges, 2 minutes each, water at 60°F.
- Week 2: 3 plunges, 3 minutes each, water at 58°F.
- Week 3: 3 plunges, 4 minutes each, water at 55°F.
- Week 4: 4 plunges, 5 minutes each, water at 55°F (or lower, if you’re feeling it!).
Listen to your body. If you’re feeling stressed or sick, skip the plunge. It’s not a competition. The goal is to feel better, not worse.
Wrapping It Up
So there you have it! Cold plunging at home doesn’t have to be complicated or expensive. Whether you go for cold showers, ice baths in your tub, or even a DIY setup, you can start reaping the benefits of cold water therapy without breaking the bank. Just remember to ease into it, listen to your body, and have fun with the process. It might feel tough at first, but with time, you’ll likely find it gets easier and even enjoyable. So grab that bucket or turn down the shower, and dive into your cold plunge journey!
Frequently Asked Questions
Can I use my bathtub for cold plunging?
Yes, you can fill your bathtub with cold water and ice to create a cold plunge. Just keep in mind that it can be costly to maintain, as you’ll need to keep buying ice.
Will I get used to the cold water over time?
Absolutely! The more you practice cold plunging, the more your body will adapt, and you’ll start to enjoy the benefits.
How cold should my shower be for cold therapy?
To feel the benefits, your shower should be below 55°F. Most showers can get down to around 50°F, which is a good start.
Can I use my swimming pool for cold plunging?
Yes, you can use your outdoor pool during colder months for cold plunging. Just make sure to keep it from freezing.
What is a cold water bucket pour?
A cold water bucket pour involves filling a bucket with cold water and ice, then pouring it over your body to experience cold exposure.
How can I start cold plunging at home?
You can start with cold showers, ice baths in your tub, or even DIY setups like stock tanks or chest freezers.
What are some safety tips for cold plunging?
Always listen to your body, limit your time in cold water, and warm up properly afterward. It’s also a good idea to check with a doctor before starting.
How do I make cold plunging part of my routine?
Set a regular schedule for your cold plunges, combine them with other healthy habits, and set achievable goals.